Showing posts with label tutorial. Show all posts

Sunday, February 23, 2014

Have Hot Iron, Will Travel (plus other February Notes)

How is it possible that February is almost over? I've worked a lot, sewn a little, and slept even less. I have to keep my eyes on the prize and remember that there is an end goal. Unfortunately it means that I will post on this blog when I can and not feel bad when time doesn't allow me to do so.

I do want to catch you up on where I've been and the fun I did manage to squeeze in mostly on weekends.
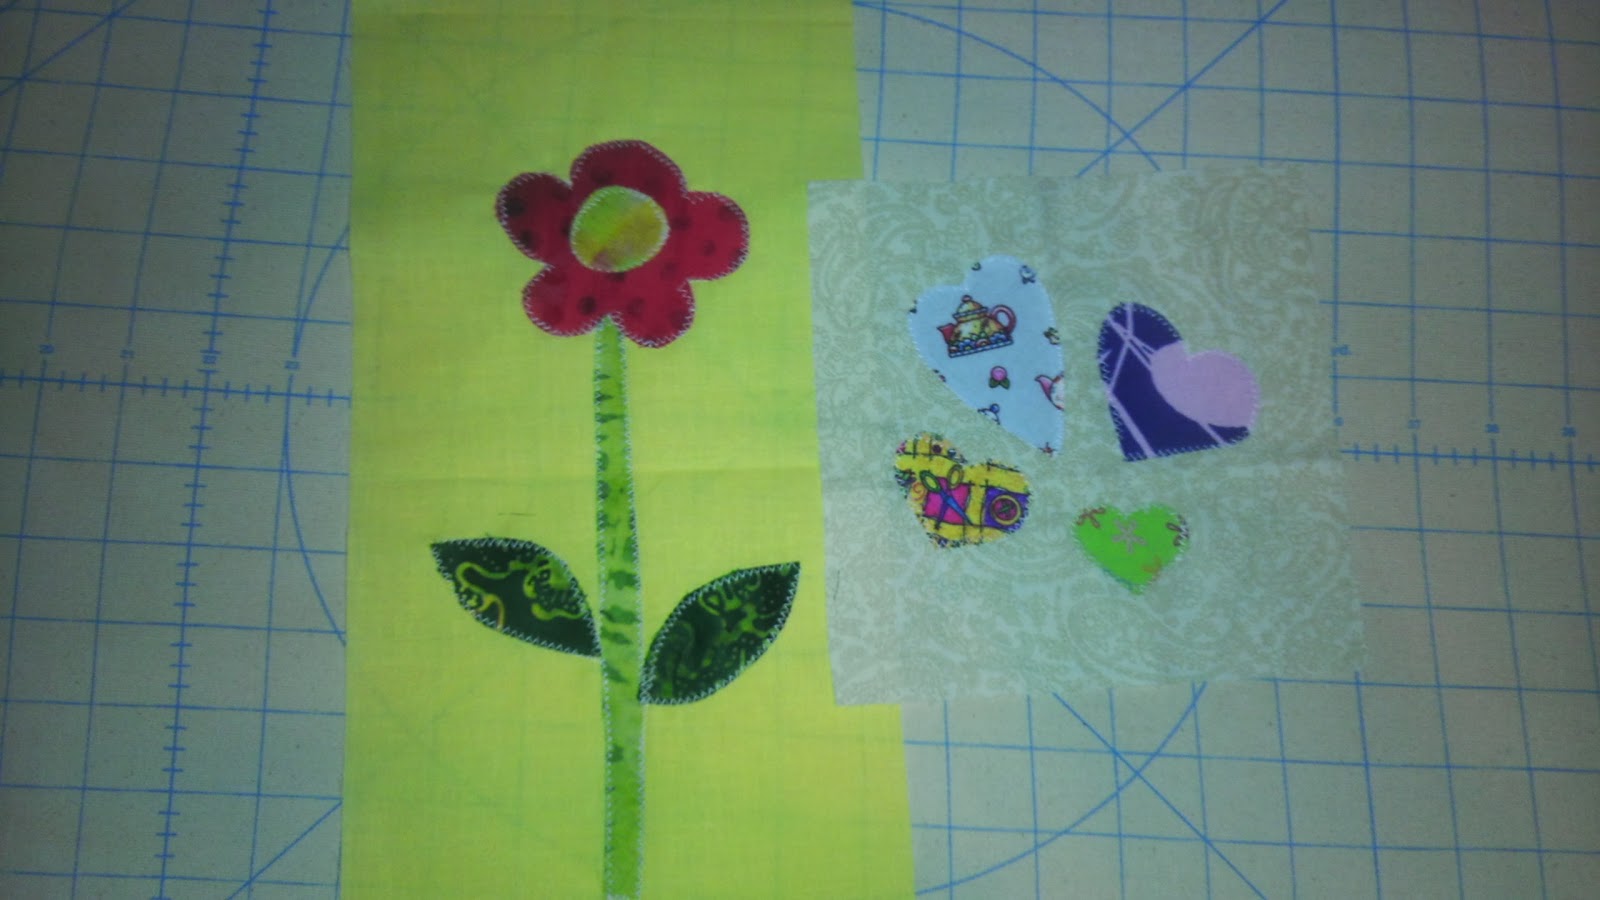
Completed Stash Bee Blocks and mailed them to England.
Hearts and Flowers in 12x6 or 6x6 blocks. I did one of each.

I also made an iron cover for traveling to and from sew days. Here's how:

First, I outlined the shape of the bottom of my iron on fabric and cut it out 1.5in larger all the way around for seam allowances.
I basted the iron shape with heat-resistant batting and the backing fabric.


I quilted the layers with straight lines to keep things simple.


I cut out the shape of the iron bottom using the top as the template.


 I roughly measured the perimeter of this shape to create the top of this cover. It was about 38 inches so I I used the width of fabric by 9 inches to be safe.
I folded over 1 inch to create a casing for the ribbon I was using.


I sewed the opposite side without the casing to the perimeter of the quilted bottom. Use lots of pins to keep the shape of the top and bottom curves.


Remember to leave a 2-3in gap from the starting and stopping point of your sewing.


Next, I sewed the two sides of the top fabric together. You can easily pinch the quilted bottom so it does not get caught in your sewing here. Do not sew the casing opening closed!


Once you finish sewing the sides together, you can close the seam along the bottom. (Double check for the correct measurement so there is no gap when you close things up to sew the last seam.)


Feed your ribbon through the casing using a safety pin. (I used this Moda jelly roll ribbon because it's so cute and it's a great way to recycle.) I tied a knot so it doesn't slip out. Ensure that your opening is more than wide enough for the iron to come in and out without struggle before your tie things off.

Sorry this picture cuts off the top but there a numerous
tutorials how how to push ribbon through casing.
Finally, flip your masterpiece inside out and kiss those biceps. You have your very own iron cover that will hold a warm iron safely for travel.

I made this during our guild's recent sew day and
actually took home a warm iron.

_________________________

I am frantically working to complete a gift for my sister's 40th birthday in March. (I can't believe how old we are already and that 40 is around the corner for me, too.) I don't think I will have it done for her actual birthday after all but she will get it as soon as humanly possible.
Here's a teaser photo:

I saw this paper pieced camera last November at our guild's retreat and started working on a sketch for my sister later that month. I can't wait to share the completed quilt with you soon.

_______________________________

And last but not least, some Orlando Modern Quilt Guild news:

At the February meeting, I was elected President. Whoo hoo! (I was unopposed so I didn't have to kiss any babies.) I'm pretty excited about this new role and look forward to a fun year with some amazing quilters.

Yesterday, the guild and I went to Trenton, Florida to spend the day at the The Suwannnee Valley Shops. I was so happy to get to know Maya during our drive and we only had to turn around twice along the way. (Stupid Google Maps!) We were the last to arrive but the journey was as much fun as the destination.

We had a wonderful lunch at the Tea Room and started our shopping spree. I came under budget on my shopping for fabric and scored these gems:
Julia Cairns for Quilting Treasures
I plan to make something for my momma with this beauty.

Hoopla and Everyday Fun by Jennifer Heynen for In the Beginning fabrics
It's all things quilting in lovely, bold colors.

Technicolor by Emily Herrick for Michael Miller Fabrics

Black and White Houndstooth
Faye Burgos for Marcus Brothers Textiles

Spotlight by Michael Miller
(So retro, so awesome!)

Terrain by Kate Spain for Moda

Zip It (Michael Miller Fabrics)
Where the Toys Are by Dan Morris
for RJR Fabrics

I loved these circles the most.
Blank Quilting (#6270)

Afterwards, we wandered over to the antique shop and found this blast from the past. I felt like a kid all over again and the price was too good to pass up.

As Rainbow Dash would say, "My quilt room just got 20% cooler".


____________________________
Stay tuned for more Tula Pink City Blocks next weekend.

Hope you are well. Leave a comment with what you've been up to in February.

Sunday, October 6, 2013

Sunday, Fun Day! - Day 6

I love rainy, quiet Sundays. I was able to get in a nice walk before the rain started and spent the rest of the day in my sewing room.
I finished my design of the Double Wedding Ring for the DWR Challenge. I spent a good part of the day cutting and organizing my colors so I can start sewing them next weekend. I'm pretty excited about the outcome and can't wait to show you when it's all done.


All 194 of my little "A" pieces!
 After all of that cutting I wanted to get some sewing done, too. I am working on a gift for my dear friends who will celebrate their ten-year anniversary next March. They are both gamers so I had many designs ideas. I wanted to give them lots of color and still keep it simple, too. I promised her a queen-sized quilt a few years ago so I have to get it done soon.  (I still don't know if I can fit it in my tiny machine. I may have to take it to the long arm!)

I decided to make them a Tetris quilt! It's squares that I can make really large and piece together really easily. I decided on 5.5 inch blocks then got to work on graph paper to make up a design. I haven't played with my Sharpie colors in a while so this was a lot of fun.
                                   

Once I had the design I wanted, I counted up the number of colors and background blocks I would need. (Somewhere along the way, I changed up the final design so please don't copy these numbers if you want to make one, too. It would be best to draw your own and count them up to work for you.)

I had to do more cutting which took no time (or any fancy templates!) to get this little baby going. 
 If you have a design wall (or clean floor) handy, lay out your blocks and start sewing them according to your design. I usually chain piece for faster sewing but had to take extra care to keep all rows organized. I started from the bottom and worked my way up the following my graph paper pattern.
Crossing out the row as I went, helped me stay organized.
I almost duplicated a row which would mean picking threads out and starting again. Yuck!

I used Post It Notes to keep all rows in order as I moved up the line and when they were all done, I lined them up to make sure I had my design just right.


My secret for lining up squares perfectly is to use pins. I stuck a pin in the opposite end of every other row to keep them organized for ironing. (I don't have a good pic but simply: Left side pinned in rows 1, 3, 5, 7 etc. Right side pinned in rows 2, 4, 6, 8, etc.) Then, I ironed each row using the pins as a guide for which direction to press the seams.

I iron from right to left.
I place my pins on the ironing board on this side so I can just press in one direction.
Make your preference work for you.

When you bring your rows together to sew, they nest perfectly every time.


I finished sewing my rows together and will be adding a border with some other finishing touches in the next few weeks. Here's what I have so far:


Quilting this will help emphasize the individual blocks that make up a Tetris piece and help this design pop. Since each color has a distinct shape, it's hard to tell the separation when looking at just the quilt top. More pictures to come!

I didn't plan on writing a tutorial but I saw the "Process Pledge" on another blog and think I should share how I create my quilts as I blog more this month.

I hope this gives you some inspiration for making your own pixelated design of something you'd love to see. I'm thinking about making a shades of black and green Tetris quilt next to make it look like the original Gameboy version I played when I was a lot younger.Then, there is Galaga, Pac-man, Ms. Pac-man [I would have called her Pac-woman but I digress]...I can make a long trip down memory lane using the old 8-bit or even 16-bit games we used to play.

Did you get to sew today?
(Hope your Sunday was a fun day!)

I am officially tired and heading to bed early for a change.